Pages

Friday 23 December 2011

Leading myself astray...

Nothing better than summer holidays I reckon, heaps of time to clean the house (...), do the washing (!!!!), yell at the kids (sometimes) and catch up with friends!
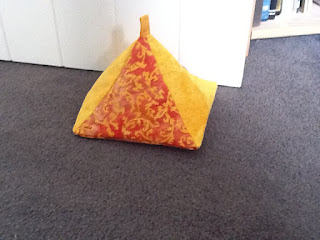
Bloghopping has been taking up some time, too, yesterday I saw a pyramid door stop on
http://patchworknplay.blogspot.com/2011/12/christmas-gift-making.html and spontaneously decided to make my own. This is the final outcome though still awaiting filling; DH suggested to use some gravel he had bought but suggested I wash that first because it is so dusty. 23h later, the stuff is still not dry, has been returned to the oven in an oventray as the sun obviously didn't do the trick today...


I once again realised that my stash is much bigger than it should be I think, and part if this is a pack of batik charm squares I would love to do sth. with. After consulting my expert quilting friend Suz I decided I will chop at least some of them, and being a real copy-cat I tried out the double disappearing nine patch as seen on http://afewscraps.blogspot.com/2011/08/double-disappearing-nine-patch.html and on http://suz-allthegoodonesaretaken.blogspot.com/search/label/Double%20Disappearing%20Nine%20Patch. Looks quite neat despite the cheap and cheerful white fabric - I had the intention of trying it out with a black with white flowers Moda fabric, not sure yet, I like it with white. Definite bonus there are hardly any seams to match, and starting with 5" squares you end up with 10" blocks - nice size to make it into a bedquilt???

Tuesday 20 December 2011

Holidays or pre-Christmas rush?

Just misspelled Christmas, that reminded me how years ago my senior students would announce my hubbie's arrival in my classroom with a "Chris, Miss". So long ago lol
So school is finally finished for the year and I am not even employed really until my permanent job starts up from 26 January - even got my holiday pay in one lump sum, VERY dangerous before Christmas... To be a good girl I paid those pesky bills yesterday and I decided against driving to the city, too - might have to go past the closest sewing shop though, I really need some calico for a screen printing project I am itching to do.

What have been up to? Last Monday night was primary school prize giving, Tuesday my youngest turned 7 (!!!) and I saw about 12 of the expected 150 parents for parent interviews, Wednesday intermediate school prizegiving, Thursday Y8 graduation, Friday last day and work xmas do which turned out to be a non-event for me as times were mucked up and I needed to be home before DH took off for night shift, Sunday 7y old birthday party at the Northland Fire House Museum and now we're finally up to the holidays!!!

In difference to other years I managed to get some baking done, you can look up "Weihnachtsstollen" if you like, that's waiting for me to form once the boys are in bed. I have worked a bit on the Dionsaur log cabins, but today I found a fun idea for xmas cards from Quilting Arts - I was hooked when I read the instructions to use some UFO (I actually usedsome leftover blocks from old projects). I have never been a prolific card writer, a few will be enough:


Merry Christmas everyone!!!

Saturday 10 December 2011

Mobile Phone Case (with window) - Tutorial

My DH has given me an early Christmas present, a new mobile phone. Now I have to admit, I like my little gadgets, and I have had a good play with it already. Being a busy and forgetful person, I tend to attach my important stuff – cellphone, keys, memory stick, tuning key for the drumset – even an eraser and a sharpener at some stage - to a lanyard or how I like to call it a ‘hang it around your neck thingy’. Anyway, new phone with touchscreen would surely get scratched soon, so after checking in the shops (“this phone is new to the market, there are no cases available yet”) I browsed the web for a tutorial on quilted cellphone cases. All I could find was pouch style cases, but I don’t want to have to take the phone out to use it so I tried to make a case I could leave on with windows for screen and camera. In case anyone else wants to make one, I documented my progress and here is my ‘tutorial’:

Fabric Mobile Phone Case (with window) - Tutorial


You need
approx. 7 x 7’’ fabric each for outer and inner (this could be pieced if you like, however, due to the window you will see little of this. Consider choosing something to go with your 'dress code')
approx. 7 x 7” heavy interfacing (like for handbags), possibly iron-on
matching binding
small piece of Velcro or string / ribbon / elastic and button
optionally 30 – 40” cord, string or similar


First, measure your phone height A and width B, then add the depth to that = B1. For my prototype I added a little flap go from front to back, so I added 1” to A = A1 – I would not bother with that again. 

You now cut from each of outer, interfacing and inner:
·         2 pieces each A x B1 plus a generous ¼ “ seam allowance all around

Iron interfacing(s) to wrong side of your inner(s).

Front piece: On the wrong side of your outer front piece, draw the size of the window you want to leave open for the screen.

Go ¼ “ in from this and using your sharp scissors, cut it out.

Now place fused inner and outer back pieces together, right sides facing, and sew the seam of your window. I went around it twice, because there will be strain on the seam.
This is actually the back piece, I forgot to take a photo of the front but you can see that I (try to) sew on the line
Turn your outer fabric through the window. You will find there is too much bulk from the seam allowance, so carefully cut it back close to the seam.
Smooth outer and iron to interfacing.

Back piece: If you want to also leave a window for the camera on the back of your phone, draw this on the wrong side of your outer back piece BUT mirror image it – meaning if your camera is top left when you look at the back of the phone, draw the window on top right . [Note: I forgot to mirror image this, therefore ended up with the window on the wrong side of the piece and had to turn my outer into the inner fabric – duh!]
(the mysteries of blogging - why does this photo imports on its side???) You can see the camera is on the left, so the marking on the wrong side of the outer fabric should have been on the right.

 To turn the outer fabric through the small camera window, cut an X into the square you have sewn and with the help of an icecream stick or similar gently poke the outer fabric to the other side. Again, cut bulk back, smooth and iron outer to interfacing.


Optionally you could now decorate the pieces to your heart's delight with fancy stitches, hand embroidery etc. etc. I chose to go for plain simply because I wanted to get on with (have always loved instant gratification projects!).

Put front and back pieces together, wrong sides facing. Sew with 1/8” seam. Try the fit with your phone, if there is too much room, just make the seam allowance bigger.
I added binding to the back before sewing both pieces together
From the front
Bind all raw edges with the method of your liking (I chose machine stitching)

Closing: I hand stitched two small pieces of Velcro to the flap and the back after finishing the binding (clever people would probably do that some time before and by machine :-)). Next time I would use a ribbon, string or elastic and attach a small loop to the front when I add the binding and just put a little button to the back.
‘Hang it around your neck thingy’ / Lanyard or neckband: I simply attached a lanyard to the phone and added a button hole to the top of the flap [note to self: Next time try out button hole stitch first as you don’t know what you are doing!!!]. Instead someone clever might want to attach cord / string or similar to the sides of the bag, either sew on with or after binding, or maybe use some small rings. I would be keen to see what others come up with!
Oops, I must have done the button hole before the binding - never mind
If your phone has buttons hidden by the fabric, you could stitch some designs on it to remind you where they are hidden. You could also add a small opening for the charger.

Finished!
Happy Stitching!

Friday 9 December 2011

Fabric Book Cover

I can thoroughly recommend Miss Lottie's Fabric Book Cover Tutorial - it took me no time at all to complete one but it won't be revealed until after Christmas for obvious reasons :-)
Here is the link http://theslightlymadquiltlady.blogspot.com/p/collaged-fabric-book-cover-tutorial.html?showComment=1323422623850 (once again, please copy and paste - iPods...).
Apart from that, not much happening on the quilting front, with the boys' school prize givings, christmas parades, 7y old birthday, my school's report evening and prize giving and graduation ceremony I simply can't wait for next week Friday!!!!!!!!!!

Sunday 4 December 2011

Quite addictive...

I have to admit, I find those log cabin blocks quite addictive. I have not quite completed 8 of them now, and I find myself wondering if I should really just have 2 x 4 blocks between the dino panels?


What might happen if I made it three or four rows, would the darks come out more or the lights? Well, knowing me, by the time I have made 8 more I will probably be sick of it and happy I am done, but already I have been contemplating using this for a quilt moving through the colours of the rainbow hmmm...
Here just a rough shot of the planned layout:
Obviously still photographically challenged, I have turned it right side up and saved it, but it won't let me display it - must be some ghost it the machine?!?
It has been absolutely pouring today, great for the water tanks, the garden, the pool, but now it's enough thank you, so hopefully tomorrow when I haven't got time to quilt the sun will come back out again!!!

Thursday 1 December 2011

Introducing Mortimer

Not a stack'n'whack but still a fairly (...) straightforward project - phewww! The worst problem was using Mystifuse without the right tools I believe. I started fusing it between two sheets of baking paper but found it hard to peel one of them off to fuse to the fabric, so Instead I fused Mystifuse to the fabric with baking paper backing - duh, now I had trouble tracing the template through (bulb in light box broken, haven't found a replacement when I last looked at the shops...). Photocopied the template, cut and taped the 'bits', attached to baking paper side of fabric - this was now ready to cleanly come off the fabric (could have done wihtout that...). Got there in the end, as a result have heaps of fabric backed with Mystifuse left over, but now I have it all fused to the background and appliqued. I decided for raw edge for the turtle itself in the end, I found the original blanketstitch too - hmmm fuzzy?? Kept that for the corals though. Now I have to get rid of a million thread ends, add a few decorative lines in the water and the corals and bond it - voila one very quick project :-) I hope he'll like it in the end! Photos will be uploaded asap. Might have to make another one to use up that leftover fabric??? Oldest DS suggested to turn it into centre for a maritime quilt...
QUESTION: Why does Mystifuse not come paper backed? What do I need to use it like paper backed fusible web? Does a teflon sheet help????? Any advice much appreciated, I really like the feel of it but I wish I would have had less hassle and waste!!!!
Isn't he adorable? I will tend to those thread tails soon
Close up after fusing before quilting

Monday 28 November 2011

Couldn't help myself...

I spent the day in the next city today, a good 80km south, home of the most northern traffic lights in New Zealand (the country does continue for a few hundred kms north - but hey, who needs traffic lights or even round-abouts when your biggest traffic jam is caused by moving stock lol). Talked to the specialist about oldest DS's Diabetes (type 1), went to numerous shops for birthday and advent calendar presents, spent an unbelievable amount of money on a glorified mp3 player (speak iPod Touch) on request of the boys (push-over mother...) and on the way home I made a quick stop at Bramble Cottage because I wanted to get some black-on-black fabric - LQS didn't have any last weekend. There I cam across "Mortimer" by Castilleja Cotton, check it out on www.castillejacottom.com/xcart/Mortimer-Quilt-Pattern.html (copy and paste in your browser window, I tried linking it but at least in the preview it didn't work).
I had not wanted to buy any mo kits, feels a bit like painting by numbers, but this one was just too cute, and Julie had done a great job quilting it! For just under $50 for the kit of top and binding, I took it and now plan to secretely put it together for christmas for my middle DS who already has three cuddly turtles and knowing him would just absolutely adore Mortimer. Another WIP, but it won't be able to go on the design wall except wehen he is on camp with DH later this week. Might have to get fastfood to feed the other two DSs in the meantime...

Sunday 27 November 2011

My First Quilt


On Leeann's site I saw the post about linking to Bonnie Hunter's First Quilts! - here is mine:


My very first quilting project was a Crazy Patchwork kit from Spotlight which still is a UFO. But shortly after that I joined a Beginners Sampler Class at Grandmother's Garden in Gordonton (Hamilton) run by Ngaire Brooks (started in Jan 2006). My youngest was just moving out of the cot, so I knew I wanted to make it for him. As in all beginner sampler courses, Ngaire introduced us to a variety of techniques incl. paper piecing etc. While I wasn't too bad at it, I have never felt compelled to go back to handwork. My biggest challenge at the time were accurate cutting and accurate 1/4' seams - my old machine had no such foot and my eye wasn't all that good even with tape markings. Regardless, he still sleeps under it, though the new dinosaur quilt will be for him, too.